Getting Started with the Render CLI
Welcome! This blog post should give you an introduction about Helios Render CLI and how to:
- Install the Render CLI
- Sync your projects to the cloud
- Render quick previews in the cloud
- Render the full project with the power of a supercomputer
- Download / sync the results of the rendering to your computer
This blog posts requires some basic know-how about Bash / Powershell / Terminal. We use the DCC 3ds Max and the Render Engine Corona.
Additional engines and DCCs are supported soon
Setup (download and install)
To get started sign up for free on our platform, choose the render CLI product and download the CLI over the generated download link:
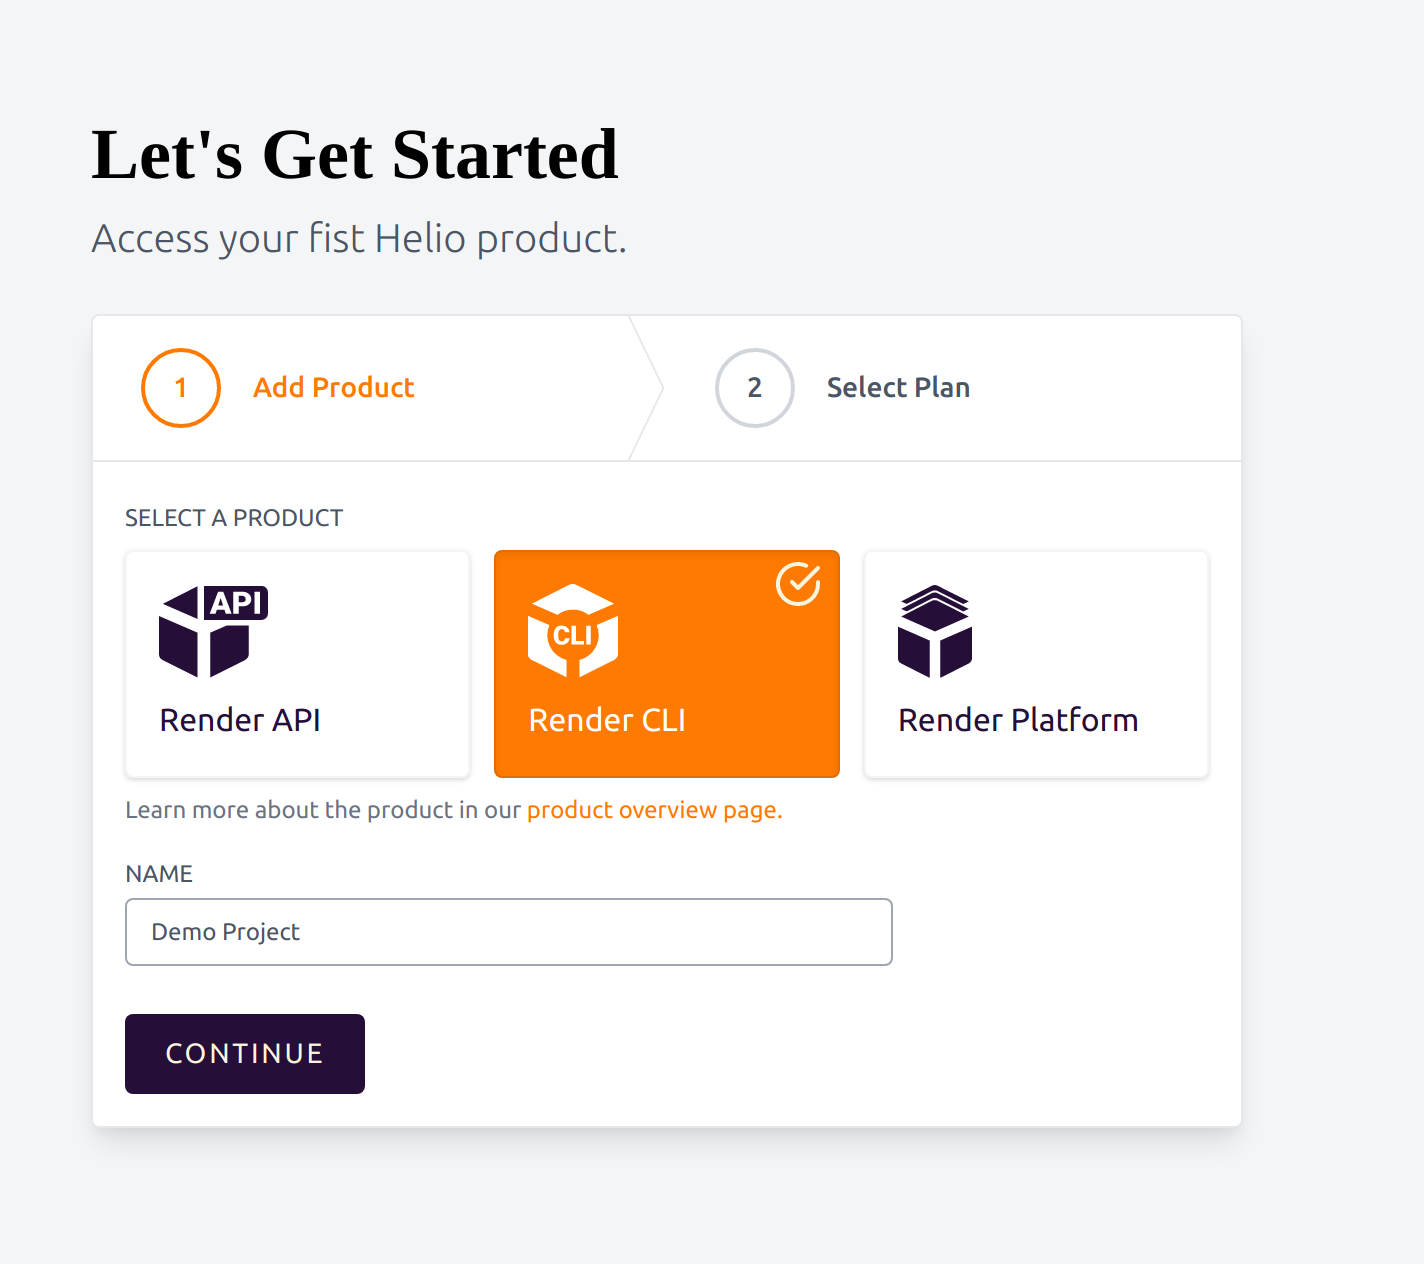
Downloading the CLI generates an authenticated and secured access to your future projects. The CLI can be used on all major OS like Linux, MacOS and Windows. For this getting started we're using Ubuntu 20.04.
Install CLI
Extract the binary file to a folder of your choice.
mkdir ~/.heliorender/
Set the right permissions to execute the binary with
chmod u+x ~/.heliorender/heliorender
Create a link to make it accessible globally so you don't have to enter the full path.
ln -s ~/.heliorender/heliorender /bin
Add Configuration
Open Helio's Platform dashboard, select your product and click the Config button on the top right.
Download the cli.json file, move it into ~/.heliorender/cli.json.
Login
To login to the platform you only need to specify your email address.
heliorender login your@email.com
During the beta there will be no password needed. The security certificates are packed with the download link into the archive. Please don't share your archive in the internet. We're working on adding a second authentication factor.
Get help
To get an overview of all commands and functions available you can enter
heliorender help
To get help for a specific command / functionality enter
heliorender help cmd
For example to get help for the preview command
heliorender help preview
File synchronization (mirror)
Uploading project files to a render farm is often time consuming and waiting for the upload to finish, when you just want to render, is annoying. This is why Helio improved the process by synchronizing the project files to the cloud (including textures etc).
The main benefit of this background sync function is, that your changes (in a project folder) are automatically available when you're ready to render a preview or render the final shot.
Doing this, allows you:
- get faster results by avoiding endless long uploads
- collaborate with your teammates on the project
- sync back the results automatically
The Helio sync can be installed on workstations, NAS, servers or also connects to cloud services like S3.
Sync the project
To have the files ready for rendering in the cloud, the project folder should be synchronized with Helio. You can compare this feature to the desktop clients of solutions like Dropbox or Google drive.
heliorender mirror <projectpath> <projectname>
For example:
heliorender mirror ~/archviz/projecta/ newbuilding
If you only specify the short version the tool will use the current path and searches for a project file (e.g. newbuilding.max).
heliorender mirror
This will sync the files as long as the window is open.
You can also specify the flag -w to watch the folder in the background.
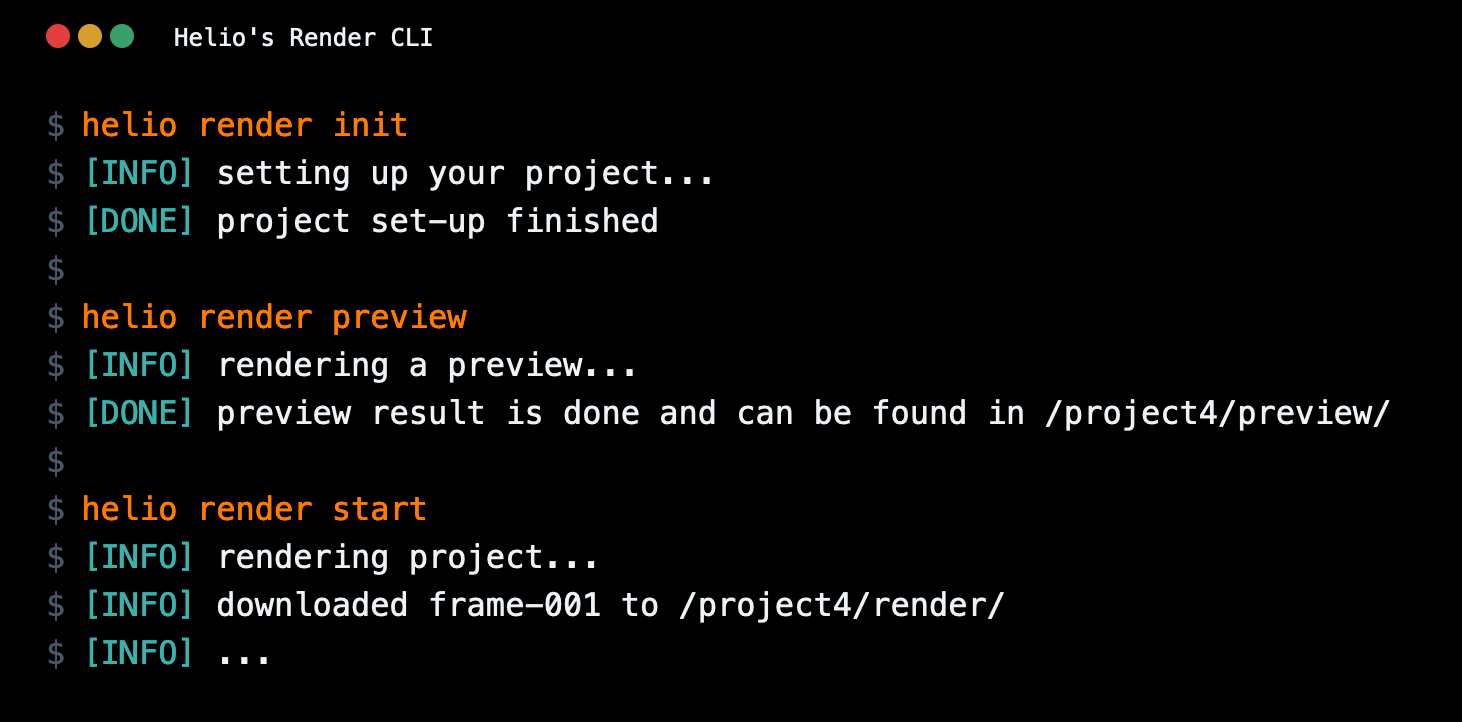
Render Preview
Rendering a preview of the project allows you to get render results within 1-2 minutes and helps you:
- Find first errors in the scene file
- Get a first impression of the light and textures
- Verify that our API has all your plugins supported
- Check your animation by looking at e.g. every 10ths frame
Render a preview
To render the preview of the project and stores the result to the folder /tmp/ enter
heliorender preview <projectname> <scenefile> --result-dir <outputdir>
For example:
heliorender preview newbuilding skyview --result-dir /tmp/
Hint: There are additional options like specific frames or the rendering of every 10th available to get a great overview for animations. The help command will guide you through this options:
heliorender help preview
View Result
Check you the results with your favorite image viewer and browse to the output folder.
Rendering
Rendering a project will assign the best matching rendering nodes to the render job:
- High-resolution still images are assigned to the fastest CPU / GPUs.
- If you add a job with 1000 frames, the job is computed on 100 powerful machines in parallel.
- Animation frames are usually distributed to as many servers as possible.
Render the job
Rendering a job is done like a preview, but obviously takes a bit longer.
heliorender render-file <projectname> <scenefile> --result-dir <outputdir>
For example:
heliorender preview newbuilding skyview --result-dir /tmp/
Additional settings
You can also just render a specific frame (in this case frame 42):
heliorender render-file <projectname> --frame 42 -d /tmp/
Or you are able to pick a camera with:
heliorender render-file <projectname> --cameras <camera> -d /tmp/
There is even more to give you full controll over your renderings:
--cameras strings Comma separated list of cameras to use--frame-blacklist ints Blacklist of Frames NOT to render.--frames string Frames to render.--frames-per-chunk int Number of frames that will be rendered in one go--height int Height of the result--noise-limit float32 Noise Limit--nth-frame int32 Render every nth frame only, skip the rest--pass-limit int Maximum number of passes to render--priority int32 Priority for the workflow (default 10)--render-type string Render file type (default "jpeg")--result-dir string Rendered frames output directory--result-name string Resulting Filename (default "rendering")--time-limit duration Duration after which to stop rendering--width int Width of the result
Check progress
To get a status and overview of the renderings, the command listis used:
heliorender list
Get logs
Reviewing the errors and outputs issued by the rendering engines and our system is possible soon.
Get Started
Sounds good? Start here. Happy rendering!
Use our User Interface?
You rather prefer a simple user interface to render your projects? We have a Render Client for your Desktop.